
Email sending
Use this page to connect the mailbox Vivlab will use to send messages to your customers automatically: order confirmations, invoices and follow-up messages. The email server is the service that sends those messages from your mailbox. You can also change their appearance and wording here. Check these settings when you first open your store, change email providers or find that customers are no longer receiving your emails.
Your email provider supplies the SMTP server (the outgoing mail address) and port (its connection number). You do not need to invent these values. When editing a message, a variable is a placeholder for real information, such as the customer's name or order number.
The dashboard is shown in French, with English captions.
Read the video steps
- — Open the order confirmation.
- — Scroll to the button label, then select it.
- — Replace the label with “View invoice”.
- — Check the button in the preview, then save.
- — The “Customized” badge confirms the template was saved.
Email server settings
Fill in the email server information so you can send automatic emails to customers who have placed an order. Emails are sent through your own mailbox: your customers see your address as the sender, and replies come back to you directly. If no address is configured yet, the page first shows an introduction: click Set up my address to open the form.
Caution
As long as these settings aren't filled in and validated by a test send, automatic emails cannot be sent: your customers receive neither order confirmation, nor invoice, nor follow-up message after their purchase. It's one of the first configurations to put in place before opening your store for sales.
- Configuration: select your provider (Go Daddy, OVH, IONOS 1&1, Gandi, Gmail, Infomaniak) to auto-fill the server and port. Choose Custom if your provider isn't listed.
- Email address: the email address used for automatic sending. It's the one that will appear as sender in messages to your customers.
- User: the username of the email account (often the same as the email address).
- Password: the password of the email account. It will always be encrypted in our database storage.
- Outgoing server: the hostname or IP address of your SMTP server.
- Outgoing port: port used by your SMTP server. The most common ports are 25, 465 and 587. Avoid port 25 if you can, since many providers have limitations on it.


Once the fields are filled in, click Send a test email to check that the configuration is correct. Vivlab then attempts a real send and tells you precisely what's wrong:
- invalid email address,
- incorrect outgoing server,
- credentials refused,
- incorrect port,
- incomplete fields.
On success, check that the email arrived in your inbox, then click Save.
Gmail and two-factor authentication
If your Gmail account is protected with two-factor authentication (recommended), the usual account password won't work here. You need to generate a dedicated app password from your Google account (myaccount.google.com, section Security > App passwords) and paste it in the Password field.
Note also that Gmail caps sending at around 100 emails per day on free accounts: for higher volume, use a service for sending automatic customer emails or your web host's mail server.
Email appearance
This section customizes the colors and borders of your emails. A preview on the right reflects every change immediately. The logo used here is your store's shared logo: replacing it updates it everywhere it appears (website, invoices, emails, receipts). The button color comes from your site theme.
- Background color: the color shown behind the message body.
- Border color: the color of the frame around the message.
- Border width: from 0 to 8 px, 1 px by default.
- Corner radius: from 0 to 32 px, 16 px by default.
Automatic emails
This section lists the messages sent automatically to your customers and lets you customize the text of each one:
- Order confirmation: sent as soon as the payment is confirmed.
- Shipping confirmation: lets the customer know the order is on its way, with tracking.
- Digital content: sends access to the purchased files.
- Donation confirmation: confirms the donation and sends the donor their receipt.
- Refund: confirms a refund has been issued.
- Withdrawal request: acknowledges receipt of a withdrawal request.
- Subscription payment: confirms a subscription installment has been charged.
- Abandoned cart reminder: reminds the customer of a cart left behind, after 24 h.
- Welcome email: greets newly registered members.
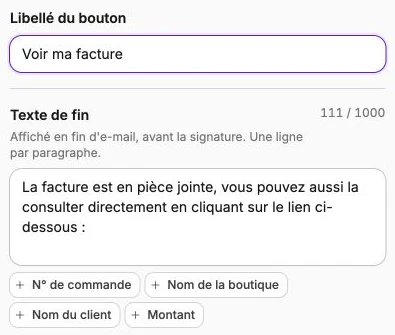
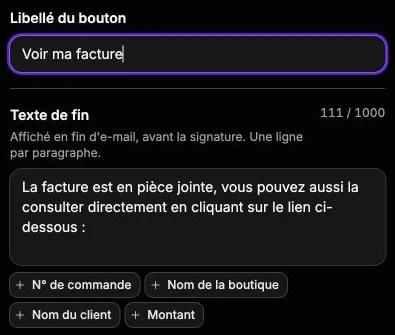
Click Edit to open the editing dialog. Every text in the message can be changed: Subject, Heading, Greeting, Main text, Button label and Closing text (1000 characters max for the main and closing texts); some messages don't show every field.
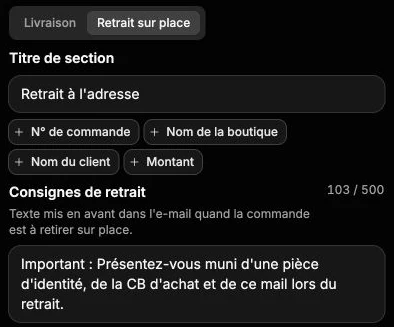
Variables (order number, shop name, customer name, amount…) can be inserted in each field and are replaced with the real values on send. The preview on the right shows the message as it will land in the inbox, sender and subject included.
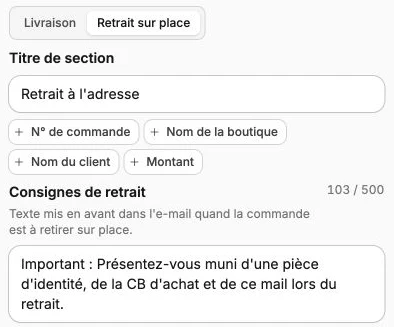
The order confirmation comes in two variants depending on how the order is received: Delivery, with its Section heading and Tracking message, and Pickup, with its Pickup instructions. These texts are capped at 500 characters.
A Custom badge marks the emails whose text has been changed. To go back to the original texts, reopen the email, click Reset, then save.