
Pop-up
A pop-up is a window that opens on top of your site: newsletter signup, welcome code, holiday closing notice. You build it in the editor, set where, when and how often it shows, then publish it.
What do you want to do?
- Create a pop-up with Assistant Vivlab
- Create a newsletter signup pop-up
- Choose when and where it shows
- Put a pop-up online or stop it
- More situations: Website: common cases
Create a pop-up with Assistant Vivlab
- Click Create a pop-up, then choose Generate with the Vivlab assistant.
- Say its goal and when it appears ("collect emails in exchange for 10% off, when visitors leave the site"), with a photo or mockup if needed.
- Wait a minute or two with the tab open, and ask for adjustments in the chat.
- Click Save, tick the pop-ups to keep in Save the pop-ups, then confirm.
The pop-up uses your brand colors and fonts and opens in the editor. Other starts: Use a template (Newsletter, Offers & promo codes, Welcome, Exit intent, Announcements, Events categories) or Blank popup, which only asks for an internal name, never visible on the site.
Create a newsletter signup pop-up
Start from a Newsletter template, check that its form has an email field, set for example After a delay of 10 seconds and Every X days, then publish. Signups land in Contacts and by email. Vivlab doesn't send newsletters: export the addresses to CSV for your emailing tool. Step by step with a promo code: Collect emails with a pop-up.
Choose when and where it shows
In the editor's Pop-up panel:
- Targets: the whole site, storefront pages, the shop or the blog, or one specific page or category.
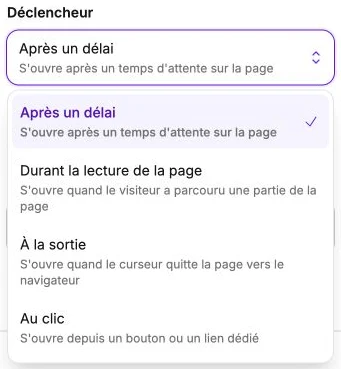
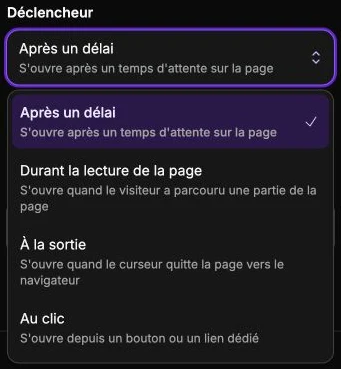
- Trigger: After a delay, While reading the page, On exit (desktop only) or On click on a button.
- Frequency: Every visit, Once per session or Every X days.
- Devices: desktop or mobile only, in the style panel's Visibility section.
Put a pop-up online or stop it
In the editor's Pop-up panel, turn on Pop-up enabled, click Publish the pop-up, check the preview on the targeted page, then publish: it switches to Published and Active. To stop it, disable it and publish: it stays saved, Inactive, ready to turn back on.
Good to know
- Nothing stops on its own: a promotional pop-up keeps showing after the offer. Add a countdown (end message past the date) and disable the pop-up at the end.
- No stacked windows: on the same page, the first triggered pop-up shows and the next ones wait for it to close. Prefer distinct targets and Once per session.
- Duplicate (⋯ menu) creates an inactive pop-up suffixed "(copy)" with the same content and settings.
- Delete (⋯ menu) is permanent and immediate on the site. Type "Delete permanently" to confirm.
- Filter the list by name, status and Publication, Trigger, Devices. Badges: Desktop only, Mobile only, Storefront page, Online shop or Blog.